Showing posts with label pun. Show all posts

Monday, July 13, 2020

DIY Easy Nutella Gift

Hey guys! Today I have a super quick and easy gift tutorial for any chocolate-and-peanut-butter lovers you know. If you are scrambling for some last minute ideas, this hopefully will come in handy! This could go for any type of butter, too. Almond, cashew, plain peanut butter, apple butter, and so on. This could even be just an addition to a gift basket or some other gift (as it was in my case).

All you need is:
-A Spoon (I chose metal because I planned to metal-stamp it but that didn't work out, but any kind would work)
-A Jar of Butter/Nutella
-Paper (for the label, preferably cardstock)
-A Ribbon or Alternative String
-Scissors
-A Pen/Marker
-Tape/Glue (almost any adhesive would do)

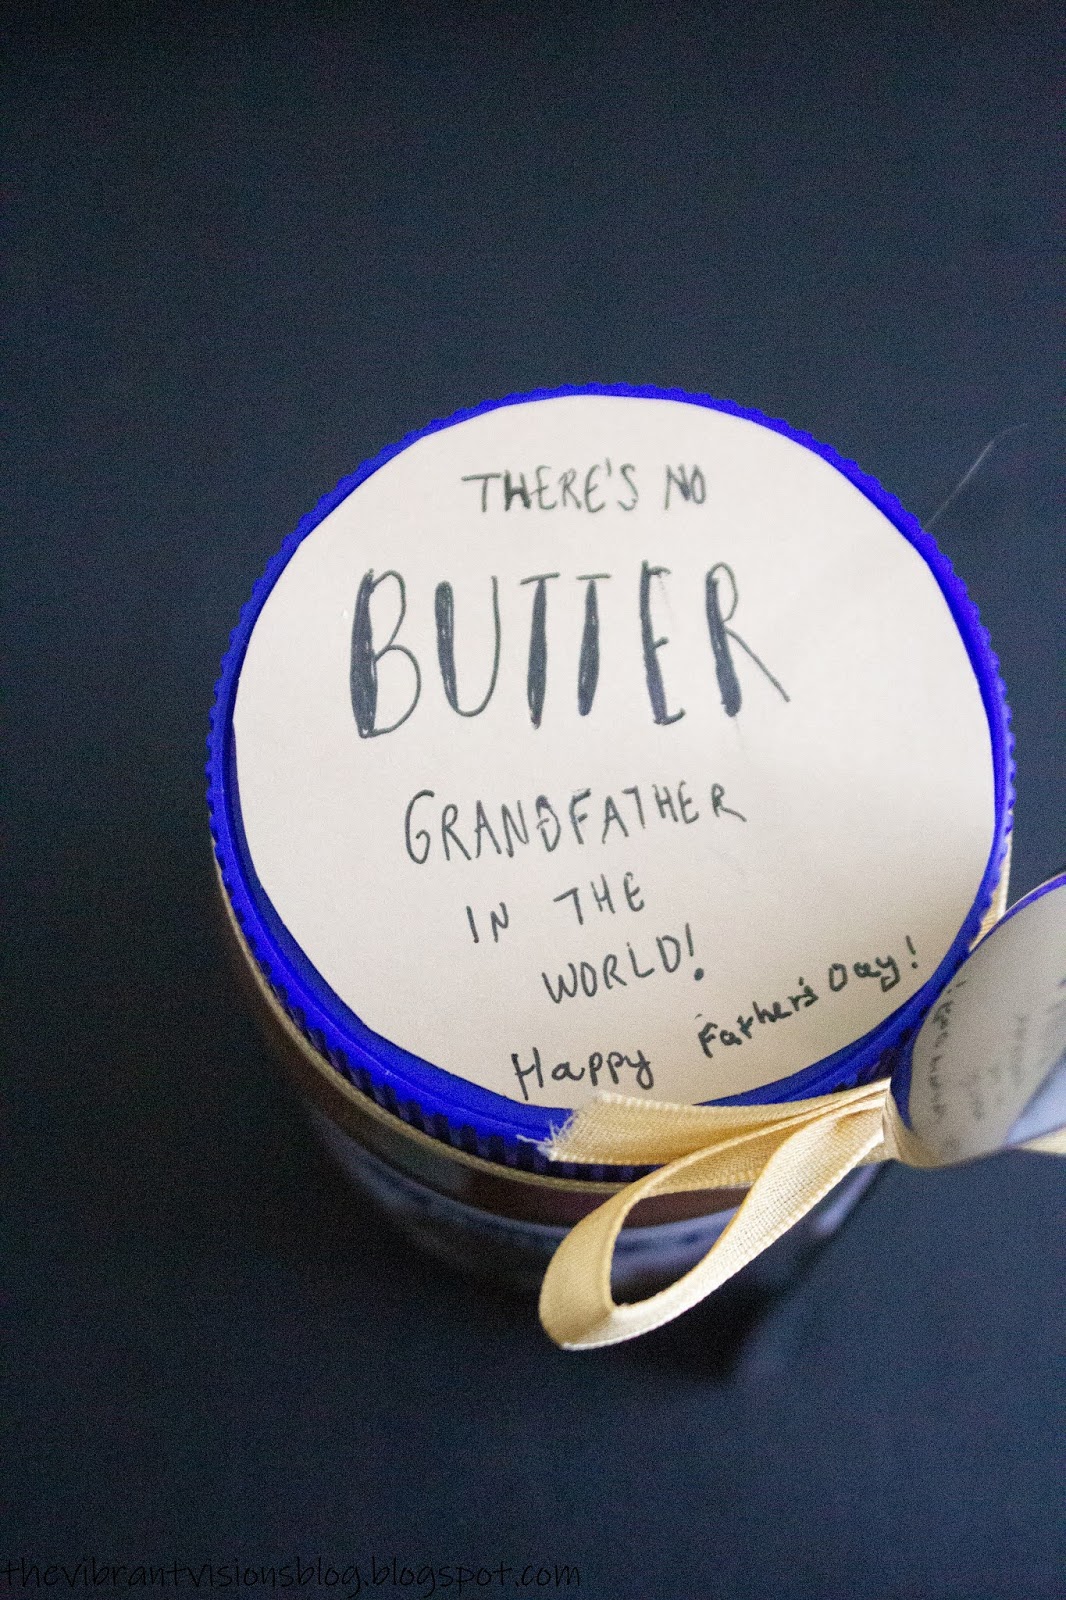
I don't even need to break this into steps as the gift is very self-explanatory. All you need to do is create the label by cutting out a circle, write "There's no 'butter' _______(fill in the blank) in the world!" or "than you!" followed by "Happy ____(fill in the blank occasion)!" You could tape or glue this onto the lid. Tie the spoon onto the ribbon or string and tie that into a bow around the mouth of the jar. That's all there is to it! 


I hope this comes in handy! Thank you for visiting! 

-Lauryn 

Share this PostPin ThisEmail This

Tuesday, August 6, 2019

"Super" DIY Father's Day Gift

Hey, guys! Here's a super easy, practical, cheap and punny gift that you can make, back from Father's Day. However, with a slight text modification, this gift for men could work for any occasion (birthday, Christmas, etcetera). 


To make this, you will need:
-Super Glue ($1 at Dollar Tree)
-Trail  Mix ($1 per bag at Dollar Tree)
-Candy (optional) ($1 at Dollar Tree)
-A Mason Jar (I buy them in bulk at Walmart so they cost under $1)
-A gift basket (I got a pack of 3 for $1 at Dollar Tree)
-The free printables below

Step 1. 
Print out the free printable card below. Fold it in half. Writing a personal message on the inside is recommended. Alternatively, you could create your own card.
Step 2. 
Pour the trail mix(es) and candy into a bowl and mix, then pour the mix into a jar. 
Step 3. 
Place everything in a basket and arrange them to perfection. How easy was that?


There you have it, a funny, thoughtful yet quick gift for men, for under $5. Enjoy!


Free Printables:


-Lauryn
Share this PostPin ThisEmail This

Monday, July 1, 2019

Bee-Themed Valentine's Day Party


Hey, everyone! I'm sorry it's been so long! I had an extremely busy spring and early summer semester. There are lots of gifts, tutorials and events I want to catch up on, so to begin with, here's a Valentine's party from way back in February. I wanted a unique party that wasn't red or pink, so I went with a punny "Hap-Bee Valentine's Day" theme. I made up the pun, but I got inspiration from several other bee parties on Pinterest. I wrote "Thanks for bee-ing a great friend!" by the favors. This party was actually a double-pun because the original date was cancelled and it took place after Valentine's Day, so it was "bee-lated". I don't have many photos because I threw this together the day of and I was too busy to take many photos. For party favors, I made hot-glue bees painted with gold nail polish on paper clips. Everyone exchanged valentines, and I will eventually share tutorials for my newest book-themed valentines. This took place at a local park. 


Thanks for visiting! I hope to share more soon!

-Lauryn
Share this PostPin ThisEmail This

Monday, February 13, 2017

DIY Jewelry Charm Valentines

Happy Valentine's Day! I meant to post this sooner, but it's not too late to make this punny girls Valentine. Reading "You are a 'charm'ing friend," these Valentine's are perfect for all ages. Below are the directions on how to make them, as well as a JPEG, free printable image.


 You will need:
-The free printable below, printed on card stock
-Scissors or (preferably) a paper cutter
-Jewelry charms (I didn't get mine here, but here's a cheap lot of key charms)
-Necklace chains or string to loop the charms through

1. First of all, cut up your printable into six equal-sized squares or rectangles. (I apologize for not having any lines to cut along).
2. Next, put your charms on a necklace chain and wrap it around the Valentine cards by cutting slits into the sides or cut slits into the corners and tape the excess chain to the back; you could use string, such as baker's twine, as an alternative to necklace chains.
3. Fill in the 'To' and 'From' blanks. You're done!

By the way, to print the image below, you can save it to your computer by right clicking and selecting 'Save image as...,' or you can right-click and select 'Open image in new tab.' If you saved the image, go to the file where you saved it, right-click again, and select print. If you chose to open it in a new tab, go to the tab. Somewhere in the top-right corner of the screen there should be some sort of icon. For me, it's three dots lined up vertically. Click that, and select print. From there, you can chose your settings such as margins and size, and then print it.


I hope you have a great day!

-Lauryn

(Please note: We are a participant in the Amazon Services LLC Associates Program, an affiliate advertising program designed to provide a means for us to earn fees by linking to Amazon.com and affiliated sites. This post contains an affiliate link.)

Share this PostPin ThisEmail This

Friday, October 21, 2016

DIY Out-of-the-Blue Party in a Box

For my grandfather's birthday, I made this party-in-a-box gift. It was late, so I called it the 'out-of-the-blue' party in a box. He lives far away, so I thought this was the perfect gift. It was pretty light to ship, too. Below I will review everything in it so that you can make one, too!


This box included:
-Cupcake topper flags, which can be found at almost any craft store, upon which I wrote "Happy Birthday, ____!" using my grandfather's name in the blank.
- I stuck some blue balloons from Walmart in as well.
- I made a party hat by stapling scrapbook paper into a cone, trimming the edges, and hot-gluing a diamond, then an initial on top of the diamond on the middle. I made a paper pom-pom, but you could buy a pom-pom to glue on top.
- I added a bundle of blue candles from Dollar Tree. 
- I cut strips of tissue paper into confetti, and used the confetti to fill
- a pinata, which you can make with numerous tutorials, such as this one.

To finish it off, I made a banner by hot-gluing paper triangles to bakers twine, and wrote "Happy Birthday" on the banner. Don't forget to add a note reading "Out-of-the-Blue Party in a Box" with a sentimental poem on the back!


I hope to share some costume tutorials soon!


Share this PostPin ThisEmail This