Showing posts with label holiday. Show all posts

Tuesday, May 27, 2025

Easter 2025

 This post is extremely short, but here are three photos from our Easter 2025. The decorations were very simple because I also did a birthday party on the same day and it felt wrong to combine the two, so I decorated our house for Easter and another house for a birthday. I painted the backdrop, which was an ordinary poster, used sticks outside for the cross, and went for a dramatic complimentary color scheme of dark red and dark green (although the backdrop turned more blue than planned) for the symbolism those colors hold. And also simply because I love that color pairing, and had not done that palette for Easter before. 


Thanks for stopping by! 

-Lauryn 

Share this PostPin ThisEmail This

Friday, August 5, 2022

Valentine's Day Snail Mail Inspiration (+ Filler Ideas)


Hello! This post may seem very random, especially following a Christmas one, but I am trying to get caught up on the past two years and although the example photos of my snail mail was for Valentine's Day, you can easily change your contents to fit any holiday or occasion. The trick is to include lightweight, small items that match a theme and harmonize through colors and designs. 

Here is a list of great snail mail fillers:

-Dried Flowers

-Small Artworks/Bible Verse Cards (Dollar Tree sells packs of these. They can also be great to slip in gift baskets.)

-Small Lotion/Hand Cream 

-Candy/Chocolate

-Hand-drawn Paper Doll 

-Stickers

-Banner (these can be handmade or printed out.)

-Confetti 

-A Letter/Card

-Tea Bags

These are just a few simple ideas, but I hope to make a longer, more comprehensive list in the future. I also like to make my own envelopes out of scrapbook paper so that they are pretty and the size I need. 


I hope you find this post useful. Thanks for stopping by! 

-Lauryn

Share this PostPin ThisEmail This

Christmas Room Tour, 2021

 Hey everyone, this is super random, but going through photos I realized I never shared my Christmas decorations. So here is either a very late or a very early Christmas room tour (from 2021). I decorated the mirror with hot-glued plants from outside. They are still holding on and look golden despite being dead! I added a bow and bell from a Dollar Tree pack of bells. I made the banner out of cut and tied strips of fabric. Most of the decorations came from thrift stores, others were gifts or décor I had from previous years. I wanted a very simple, minimalist feel with blush pink, burgundy, gold, and neutral brown colors. 


I hope you enjoyed!


-Lauryn

Share this PostPin ThisEmail This

Friday, January 14, 2022

Valentine's Day Party, 2021


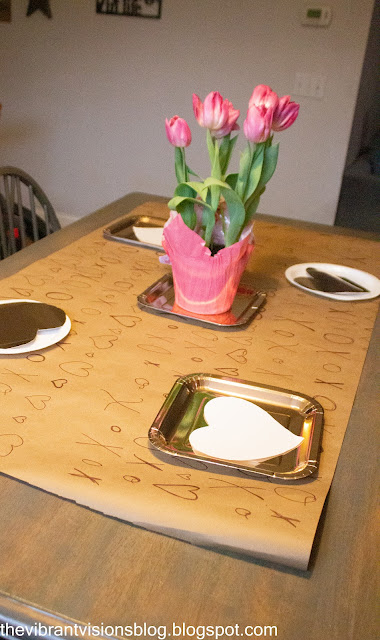
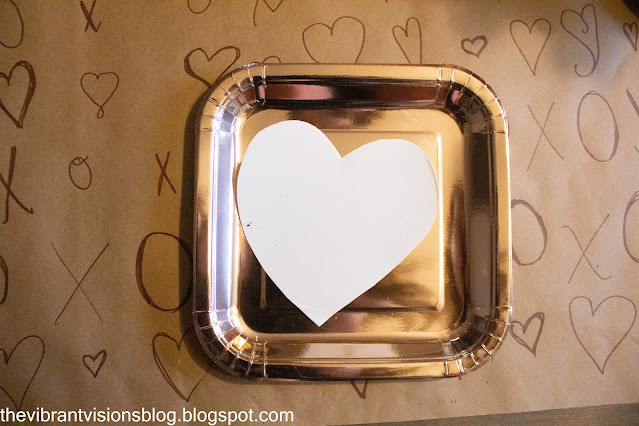
Hey, thank you for stopping in. Here is a party post at last that is actually relevant to the time of the year. I realized I never posted our little Valentine's Day party/décor from last year, so here are the pictures of our Valentine's party of 2021. The tablecloth and bouquet wrapping were just brown Dollar Tree wrapping paper I drew on. The hearts were made from paper plates. If I have a guess, all of the florals came from Ingles. I was kind of going for a playful, whimsical, floral look to make it different from past parties.


I hope you enjoyed! 

-Lauryn

Share this PostPin ThisEmail This

Tuesday, March 24, 2020

St. Patrick's Day, 2020


Hello everyone! Today I would like to share a quick post with my simple, little St. Patrick's Day party from last week. This was super last minute and therefore very easy to throw together. I made the coin banner with Dollar Tree coins that I used for the Under the Sea party in my last post by hot-gluing them to a string. I made the poster with a black gel ink pen and gold acrylic paint. I never ended up photographing food on the cake stand, so the photos look a bit strange. I wanted a unique color scheme that did not have any green, so I went with black, white and gold. 


This was just a small, brief post, but I plan to share more parties, gifts and tutorials soon, so stay tuned! Thanks for stopping by!

-Lauryn
Share this PostPin ThisEmail This

Friday, January 10, 2020

Christmas Room Tour, 2019

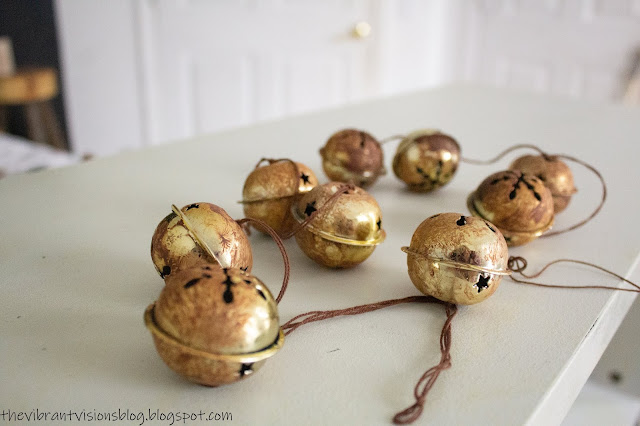
Hello, everyone! I'm so sorry I haven't posted in forever! I have a crazy, overwhelming amount to catch up on, but maybe this will be the year I can  become more consistent. Anyway, here is a brief Christmas bedroom tour from this past Christmas season. At the bottom I will include a tutorial for my bell banner, which is super easy to make. Even though the time is past, hopefully this will come in handy for the Christmas season of 2020.


Bell banner tutorial:

You will need:
-Bells (mine were a pack of regular sized bells from Dollar Tree)
-Brown acrylic paint
-A paintbrush
-A paper towel of some alternative
-A string

Step 1. Lay the bells out on something you can paint such as a paper plate. Use a medium-sized paint brush that is frayed, if possible, and dab brown paint. You can dab the paint over the whole bell or just in parts. I suggest leaving negative space for a rusty look. Then dab the wet paint with tissue or a napkin. The texture should look rough. Do one side, let them dry, then repeat the process for the other side of the bells.

Step 2. String the bells onto a long string and tie them on as you string them individually so that they don't slide around. That's all there is to it!

I was going for a modern-farmhouse mixed with modern-Scandinavian style, and since metallic and shimmering things seemed to be in style, I ended up incorporating some shiny sequins and a sparkly silver tree in my tree display as well as the gold bell banner. I made a dried orange banner that I was very excited about, but then I never actually strung it up and they rotted. The beautiful nativity string art was created by a friend and sold in support of my local HCT theater, and my little brother drew my wonderful Knee-Neep Christmas picture. I typed the typography print on Microsoft word and printed it on brown card-stock, then just drew the star. I saw that quote and design on a welcome mat online. Overall, I wanted a warm Christmas environment that was very natural and minimalist-looking with a calm sort of elegance. I hope you enjoyed the tour!

-Lauryn
Share this PostPin ThisEmail This