Showing posts with label decor. Show all posts

Friday, August 5, 2022

Christmas Room Tour, 2021

 Hey everyone, this is super random, but going through photos I realized I never shared my Christmas decorations. So here is either a very late or a very early Christmas room tour (from 2021). I decorated the mirror with hot-glued plants from outside. They are still holding on and look golden despite being dead! I added a bow and bell from a Dollar Tree pack of bells. I made the banner out of cut and tied strips of fabric. Most of the decorations came from thrift stores, others were gifts or décor I had from previous years. I wanted a very simple, minimalist feel with blush pink, burgundy, gold, and neutral brown colors. 


I hope you enjoyed!


-Lauryn

Share this PostPin ThisEmail This

Friday, January 14, 2022

A Tour of My Art Classroom Throughout 2021

 Hello, today I'd like to share some photos of my art classroom (used for middle school). I may not have mentioned it on the blog, but last fall I was hired as an art and drama teacher for grades K-12. These photos are from three different periods my first semester: my original decorations at the beginning of the semester, fall decorations, and Christmas decorations (they may be slightly out of order). I hope you enjoy the tour! 


Thank you for visiting, I have more to share with you (hopefully soon)!

-Lauryn
Share this PostPin ThisEmail This

Tuesday, March 24, 2020

St. Patrick's Day, 2020


Hello everyone! Today I would like to share a quick post with my simple, little St. Patrick's Day party from last week. This was super last minute and therefore very easy to throw together. I made the coin banner with Dollar Tree coins that I used for the Under the Sea party in my last post by hot-gluing them to a string. I made the poster with a black gel ink pen and gold acrylic paint. I never ended up photographing food on the cake stand, so the photos look a bit strange. I wanted a unique color scheme that did not have any green, so I went with black, white and gold. 


This was just a small, brief post, but I plan to share more parties, gifts and tutorials soon, so stay tuned! Thanks for stopping by!

-Lauryn
Share this PostPin ThisEmail This

Friday, January 10, 2020

Christmas Room Tour, 2019

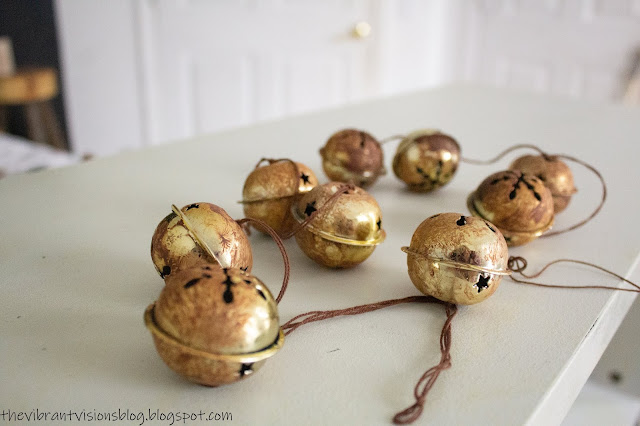
Hello, everyone! I'm so sorry I haven't posted in forever! I have a crazy, overwhelming amount to catch up on, but maybe this will be the year I can  become more consistent. Anyway, here is a brief Christmas bedroom tour from this past Christmas season. At the bottom I will include a tutorial for my bell banner, which is super easy to make. Even though the time is past, hopefully this will come in handy for the Christmas season of 2020.


Bell banner tutorial:

You will need:
-Bells (mine were a pack of regular sized bells from Dollar Tree)
-Brown acrylic paint
-A paintbrush
-A paper towel of some alternative
-A string

Step 1. Lay the bells out on something you can paint such as a paper plate. Use a medium-sized paint brush that is frayed, if possible, and dab brown paint. You can dab the paint over the whole bell or just in parts. I suggest leaving negative space for a rusty look. Then dab the wet paint with tissue or a napkin. The texture should look rough. Do one side, let them dry, then repeat the process for the other side of the bells.

Step 2. String the bells onto a long string and tie them on as you string them individually so that they don't slide around. That's all there is to it!

I was going for a modern-farmhouse mixed with modern-Scandinavian style, and since metallic and shimmering things seemed to be in style, I ended up incorporating some shiny sequins and a sparkly silver tree in my tree display as well as the gold bell banner. I made a dried orange banner that I was very excited about, but then I never actually strung it up and they rotted. The beautiful nativity string art was created by a friend and sold in support of my local HCT theater, and my little brother drew my wonderful Knee-Neep Christmas picture. I typed the typography print on Microsoft word and printed it on brown card-stock, then just drew the star. I saw that quote and design on a welcome mat online. Overall, I wanted a warm Christmas environment that was very natural and minimalist-looking with a calm sort of elegance. I hope you enjoyed the tour!

-Lauryn
Share this PostPin ThisEmail This