Showing posts with label time. Show all posts

Friday, August 5, 2022

One-Point Perspective Memory Room Drawings

  Hello! Here is a lesson I thought was pretty successful I did with my middle school students in a unit themed around time and memories. In that unit, we studied folk art, Grandma Moses and Clementine Hunter. This assignment was to illustrate a three-dimensional-looking room that is inspired by one or multiple memories using one point perspective. For example, I did a room with a checkered floor, giant chess pieces, a grand piano, and other decorations inspired by books that influenced me and the memory of my first piano. I walked students very carefully step-by-step through the process of using a ruler to make an X, then a square in the center using those lines, then demonstrated how everything follows the grid lines, getting larger near the viewer but higher and smaller in back. Here are student examples: 


I hope you find this lesson idea helpful!

-Lauryn


Share this PostPin ThisEmail This

Sunday, July 3, 2022

Folk Art Tunnel Books (Middle School Art Lesson)


Good Sunday morning, everyone! I am happy to announce that since I have started adding art lessons and plan to continue posting some when I have time for blogging, I plan to create a separate page like the "Events" and "Gifts" pages where those can be easily accessed for my fellow art teachers (or people looking for an art lesson, creative parents, teachers of other subjects, or anyone interested, really). Speaking of art lessons, the one I'd like to share today was part of a folk art unit themed around memories/time, this one inspired by Grandma Moses. 

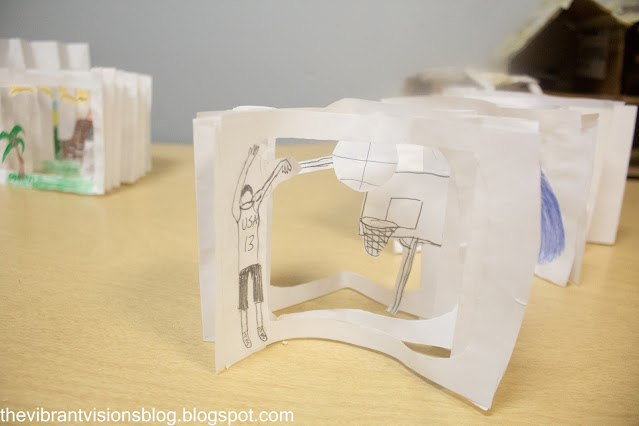
The assignment was to create a tunnel book featuring a memory (or mashing memories together) that was (or were) important to the student. I got this wonderful tunnel book project idea from this link from Dali's Moustache: http://dalimoustache.blogspot.com/2014/02/tunnel-book-fun-with-8th-grade.html. I'd seen but never knew the name of tunnel books, and certainly never made one prior to this, so I used Youtube tutorials and they are surprisingly simple, even for very non-mathematical people like me lacking in measuring and cutting skills. I broke it down step-by-step for my middle school students (I did it with grades 5th-7th). This project applies the art elements of line, shape, and form. I handwrite my lesson plans and I am not required to state all of the standards met at my school (praise the Lord) although they do align with national and GA state art education standards. In case you were interested in seeing the actual lesson document, I tried to add it to this post but I could not attach or paste it (sorry!). 


I hope you enjoyed this post and have a great 4th of July!


-Lauryn

Share this PostPin ThisEmail This

Thursday, May 17, 2018

Time Flies Birthday Party


This birthday party took place last month for my grandfather's birthday (you can also take a look at Robert's Seaside party and Weather party). I couldn't figure out what theme to do, but I fortunatley came upon this super inspiring birthday party that had a 'time flies' theme, which I thought quite fitting for him since he always says "wow, time flies." I love how this theme can really work for any age, and it makes a great adult party theme. It was also easy to throw together, and I was short on time. There are lots of tutorials for giant paper airplanes online, although it took me a while to get the hang with it since I don't do well with folding or instructions. I used my Dollar Tree wrapping paper for the backdrop. The tassel banner was made with silver Dollar Tree tissue paper. I had the antique cameras, keys, plants, and pocket-watch on hand. I made the 'Time Flies' picture by using brown scrapbook paper, stamping it with a clock stamp, cutting out the letters from white cardstock and gluing them on. The cakestand that held party favors was made with a hot-glued candlestick and recylced pan. I made Polymer clay airplanes that ended up looking like dolphins painted with nail polish for favors. I also found some blue items in my 'party favor box' in our garage which I put in favor bags with handmade confetti. I tied the bags with twine and created tags for both favors with my clock stamp. 


I hope you enjoyed!

-Lauryn
Share this PostPin ThisEmail This